
Looking to enhance your hiking experience? Follow these 7 easy steps to create your own personalized hiking stick.
1. Gather the materials
2. Choose the right length and thickness
3. Remove the bark
4. Add a handle
5. Apply a protective finish
6. Make it your own
With this practical guide, you’ll have a sturdy and customized hiking stick in no time.
So, get ready to hit the trails with confidence and style!
Table of Contents
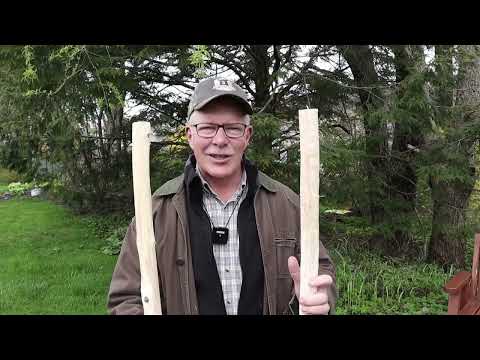
Related Video: "How to Make a Hiking Staff - a Complete Guide" by Mark Young
Main Points
– Gather a sturdy and straight piece of wood, ideally around shoulder height for comfortable grip
– Consider your height, terrain, and personal comfort when choosing the right size and thickness of the stick
– Carefully remove the bark and sand the stick to create a smooth surface
– Enhance functionality by adding a handle or grip, such as rubber grip or foam handle, and personalize the stick with unique designs or decorations
Gathering the Necessary Materials

To make a hiking stick, you’ll need to gather the necessary materials. Don’t worry, it’s easier than you think! Here’s a step-by-step guide on how to make a hiking stick.
First, you’ll need to find a sturdy and straight piece of wood. Look for fallen branches or ask permission from landowners if you’re in a park or forest. The ideal length is around shoulder height, so you can comfortably hold it while walking.
Once you have your wood, you’ll need a few tools to shape and smooth it. Grab a saw to trim the stick to your desired length, and a knife or sandpaper to remove any rough edges. Safety goggles and gloves are also a good idea to protect yourself while working.
Now, let’s talk about decorations. While not necessary, adding some personal touches can make your hiking stick unique. You can carve designs, wrap it with colorful paracord, or attach a compass or whistle for extra functionality.
Lastly, don’t forget to seal your hiking stick with a protective finish. This will help prevent it from cracking or splintering over time. You can use varnish, polyurethane, or even a natural oil like linseed or tung oil.
Congratulations! You now know how to make a hiking stick. Get out there, explore nature, and enjoy your DIY creation!
Choosing the Right Length and Thickness

Now that you have gathered all the necessary materials, it’s time to choose the right length and thickness for your hiking stick.
The ideal length will depend on your height and personal preference, while the thickness should be determined by the level of support and durability you desire.
Factors such as terrain and intended use will also play a role in determining the perfect size.
Ideal Length and Thickness
When choosing the ideal length and thickness for your hiking stick, consider the terrain and your personal comfort.
The length of your hiking stick should be determined by your height and the type of terrain you’ll be traversing. For flat or gently sloping terrain, a stick that reaches your wrist when your arm is bent at a 90-degree angle is a good starting point.
If you’ll be hiking on steep or rugged trails, a longer stick that reaches your armpit may provide better stability.
As for thickness, a stick with a diameter of around 1 to 1.5 inches is recommended for most hikers. However, if you have larger hands or prefer a more substantial grip, you may opt for a thicker stick.
Ultimately, the ideal length and thickness of your hiking stick should be based on what feels comfortable and secure for you.
Factors Affecting Size
You should carefully consider the factors that affect the size of your hiking stick, such as your height and the type of terrain you’ll be hiking on. These factors play a crucial role in determining the ideal length and thickness of your hiking stick.
When it comes to length, a general guideline is that the stick should reach up to your chin when standing upright. This allows for a comfortable grip and proper balance. However, if you’ll be hiking on steep or rugged terrain, you might want to opt for a slightly shorter stick to ensure better maneuverability.
As for thickness, it should be sturdy enough to support your weight but not too thick that it becomes cumbersome to hold.
Comfort Vs. Functionality
Consider your comfort and functionality when choosing the length and thickness of your hiking stick. The right length ensures that your stick provides adequate support and stability, while the appropriate thickness ensures a comfortable grip.
A stick that’s too short may not provide enough support, while one that’s too long may be cumbersome to carry. Similarly, a stick that’s too thin may cause discomfort and strain on your hand, while one that’s too thick may be difficult to hold for extended periods.
Finding the right balance between comfort and functionality is essential. Take the time to try out different lengths and thicknesses to determine what feels best for you. Ultimately, the goal is to have a hiking stick that you can rely on throughout your journey, providing both comfort and functionality.
Removing the Bark and Sanding the Stick
After selecting your hiking stick, begin by carefully removing the bark and sanding the stick to create a smooth surface. This step is crucial because it not only enhances the overall look of your hiking stick but also improves its functionality. The removal of the bark helps to prevent any potential splintering and allows you to have a better grip on the stick.
To remove the bark, start by using a sharp knife or a chisel. Gently scrape the bark away, being careful not to damage the wood underneath. It’s important to work slowly and methodically, removing small sections of bark at a time. Once the bark is removed, you’ll notice the natural beauty of the wood beneath.
Next, it’s time to sand the stick. This step is necessary to create a smooth and comfortable surface. Start with a coarse-grit sandpaper to remove any rough spots or imperfections. Then, move on to a finer-grit sandpaper to achieve a polished finish. Sand the stick in a circular motion, paying extra attention to any knots or uneven areas.
Remember to always sand with the grain of the wood to avoid damaging the stick. Once you’re satisfied with the smoothness of the surface, wipe away any dust and debris. Your hiking stick is now ready for the next step in its transformation.
Adding a Handle or Grip
To enhance the functionality of your hiking stick, attach a handle or grip. Adding a handle or grip to your hiking stick can provide extra comfort and stability during your outdoor adventures.
There are several options to choose from when it comes to selecting a handle or grip for your hiking stick. One popular choice is a rubber grip, which offers a soft and comfortable surface to hold onto. Rubber grips are also known for their durability and ability to withstand various weather conditions.
Another option is a foam handle, which provides a cushioned grip that can help reduce hand fatigue during long hikes. Foam handles are lightweight and easy to grip, making them a great choice for avid hikers.
Alternatively, you could also consider wrapping your hiking stick with paracord or leather for a more rustic and personalized touch.
Whichever handle or grip you choose, make sure it’s securely attached to your hiking stick using strong adhesive or by wrapping it tightly. This will ensure that it stays in place and provides the support and comfort you need while trekking through rough terrains.
Remember, the right handle or grip can make all the difference in your hiking experience, so take the time to find one that suits your preferences and needs.
Happy hiking!
Applying a Protective Finish
For added durability and protection, apply a protective finish to your hiking stick. This step is essential to ensure that your stick can withstand the elements and last for many adventures to come. There are several options for protective finishes, but one of the most popular and effective choices is polyurethane. Polyurethane forms a hard, clear coating that not only protects the wood from moisture and UV rays but also enhances its natural beauty.
To apply the protective finish, start by preparing your hiking stick. Make sure it’s clean and free from any dust or debris. If needed, lightly sand the surface to smooth out any rough spots. Next, grab a clean, lint-free cloth or brush and dip it into the polyurethane. Apply a thin, even coat to the entire surface of the stick, making sure to cover all the nooks and crannies. Allow the first coat to dry completely before applying a second coat.
After the final coat has dried, inspect your hiking stick for any areas that may need touch-ups. If necessary, lightly sand those spots and apply an additional coat of polyurethane. Once you’re satisfied with the finish, let the stick cure for at least 24 hours before using it on your next hike.
Personalizing Your Hiking Stick
Now that you’ve learned how to make a hiking stick, it’s time to put your personal touch on it.
Personalizing your hiking stick is a great way to make it unique and reflect your own style. You can choose from a variety of designs and add personal touches that make it truly one-of-a-kind.
Let’s explore some points on how to personalize your hiking stick and make it stand out on the trails.
Choosing Unique Designs
Add your personal touch to your hiking stick by choosing unique designs that reflect your style and personality. Here are some ideas to help you get started:
– Carve intricate patterns: Use a carving knife to create beautiful designs like flowers, animals, or geometric shapes. This will make your hiking stick truly one-of-a-kind.
– Burn designs into the wood: With a woodburning tool, you can create intricate patterns and images by burning them onto the surface of your hiking stick. This technique adds a rustic and artistic touch.
– Wrap colorful paracord: Wrap your hiking stick with vibrant paracord in different patterns and colors. This not only adds a pop of color but also provides a comfortable grip.
– Attach meaningful charms: Add small charms or pendants that hold special meaning to you. It could be a symbol of your favorite hobby, a reminder of a special place, or a token of good luck.
– Paint with vibrant colors: Use acrylic paints to add a splash of color to your hiking stick. Experiment with different patterns, designs, and colors to create a unique and eye-catching look.
Adding Personal Touches
To add a personal touch to your hiking stick, consider incorporating unique designs that reflect your style and personality. Adding personal touches not only makes your hiking stick stand out but also adds a sense of individuality to your outdoor adventures.
One way to personalize your hiking stick is by carving intricate patterns or symbols into the wood. You can also paint or stain the stick in colors that resonate with you.
Another option is to attach small trinkets or charms that hold special meaning to you. Additionally, you can wrap the handle of the stick with colorful paracord or decorate it with beads or feathers.
The possibilities are endless when it comes to personalizing your hiking stick, so let your creativity shine and make it truly your own.
Testing and Using Your Homemade Hiking Stick
To test and use your homemade hiking stick, grip it firmly and take it for a walk on a trail that matches your hiking level. Here are some tips to help you make the most of your hiking stick:
– Find the right length: Experiment with different lengths to find the one that feels comfortable and suits your height. Your arm should be slightly bent when holding the stick.
– Adjust the grip: If your stick has a grip, make sure it fits comfortably in your hand. You should be able to hold it securely without straining your fingers.
– Use it for stability: Your hiking stick can provide extra stability as you navigate uneven terrain. Plant it firmly on the ground and lean into it as needed.
– Test its durability: Give your stick a good shake and make sure it feels sturdy. It should be able to withstand your weight and provide reliable support.
- Maintain it: After each hike, inspect your hiking stick for any signs of wear and tear. Clean it if necessary and store it in a cool, dry place to prevent damage.
Frequently Asked Questions
Are There Any Alternative Materials That Can Be Used Instead of Wood for Making a Hiking Stick?
You can definitely use alternative materials like carbon fiber or aluminum for making a hiking stick. They are lightweight, durable, and offer great performance on the trail. Give them a try!
How Long Does It Usually Take for the Bark to Fully Dry After It Has Been Removed?
Once you've removed the bark, it usually takes a few weeks for it to fully dry. Remember, patience is key when it comes to preparing your hiking stick for the trails.
Can Different Types of Grips or Handles Be Added to the Hiking Stick?
Yes, you can add different types of grips or handles to your hiking stick. This allows for better grip and comfort while hiking. Consider options like rubber, cork, or leather grips to enhance your hiking experience.